最近使用 Apisix 网关时,需要开启 gzip 功能,通过查阅资料学习,了解了几种开启 gzip 的方式,本文记录2种 Apisix 开启 gzip的方式。
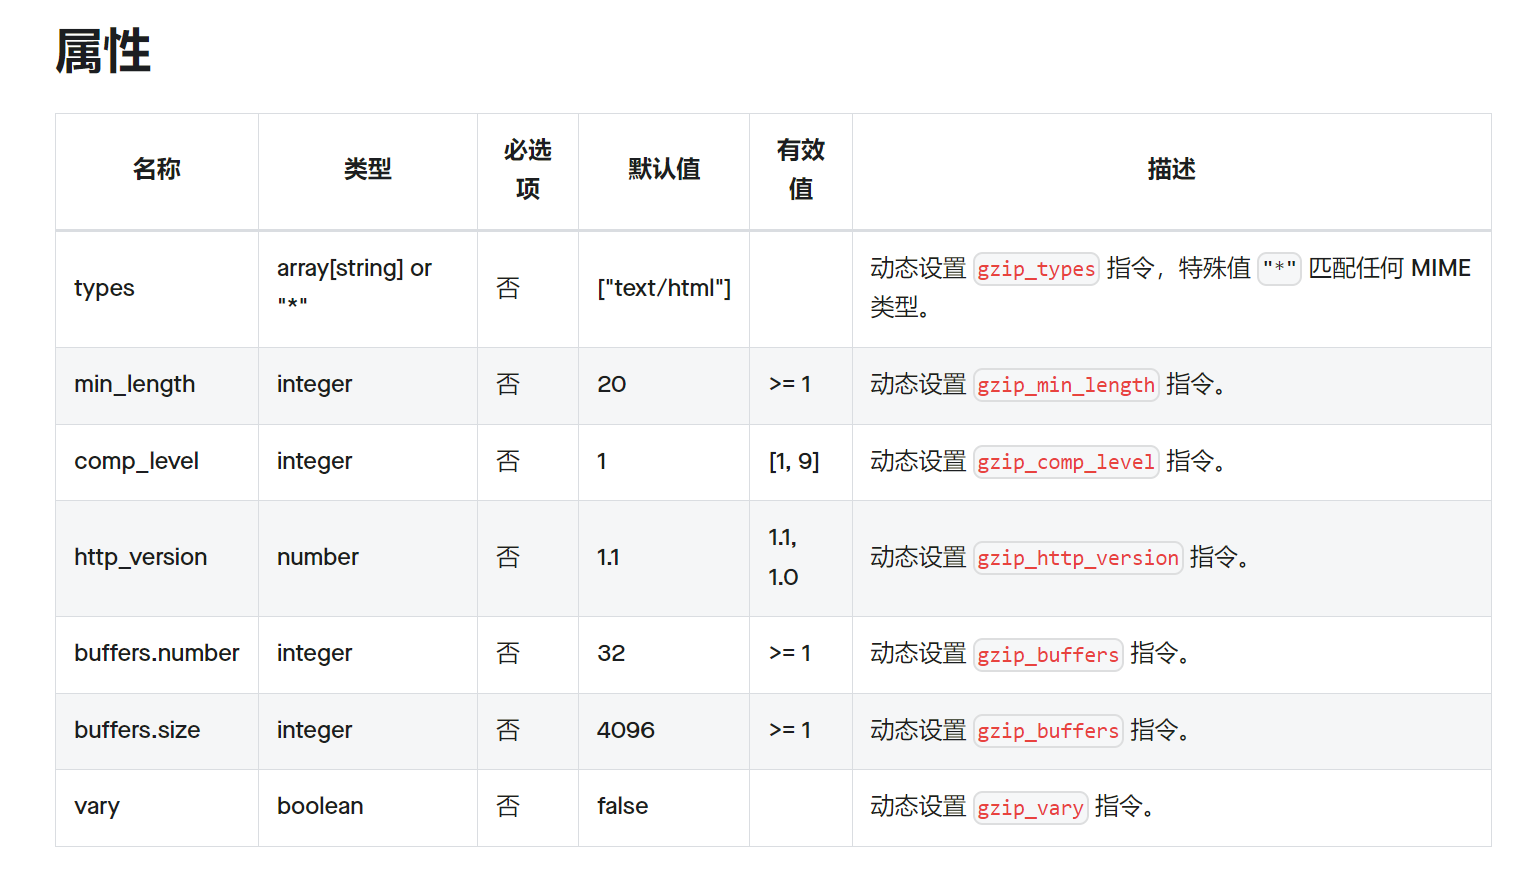
gzip插件#
我们可以使用 gzip插件 针对某些路由开启 gzip,只需对路由使用 gzip插件并配置一些插件属性即可.
接下来使用一个例子来演示 gzip 插件,使用 apisix admin api 创建一条路由,要注意的是本文的例子是使用 apisix 3.7 版本:
 1
 2
 3
 4
 5
 6
 7
 8
 9
10
11
12
13
14
15
16
17
18
19
20
21
22
23
24
25
26
27
28
29
30
31
32
33
34
35
36
37
38
| curl -i http://127.0.0.1:9180/apisix/admin/routes \
-H 'X-API-KEY: edd1c9f034335f136f87ad84b625c8f1' -X POST -d '
{
"uri": "/get",
"plugins": {
"gzip": {
"buffers": {
"number": 8
},
"comp_level": 6,
"disable": false,
"types": "*"
}
},
"upstream": {
"nodes": [
{
"host": "httpbin.org",
"port": 443,
"weight": 1
}
],
"timeout": {
"connect": 6,
"send": 6,
"read": 6
},
"type": "roundrobin",
"scheme": "https",
"pass_host": "pass",
"keepalive_pool": {
"idle_timeout": 60,
"requests": 1000,
"size": 320
}
},
"status": 1
}'
|
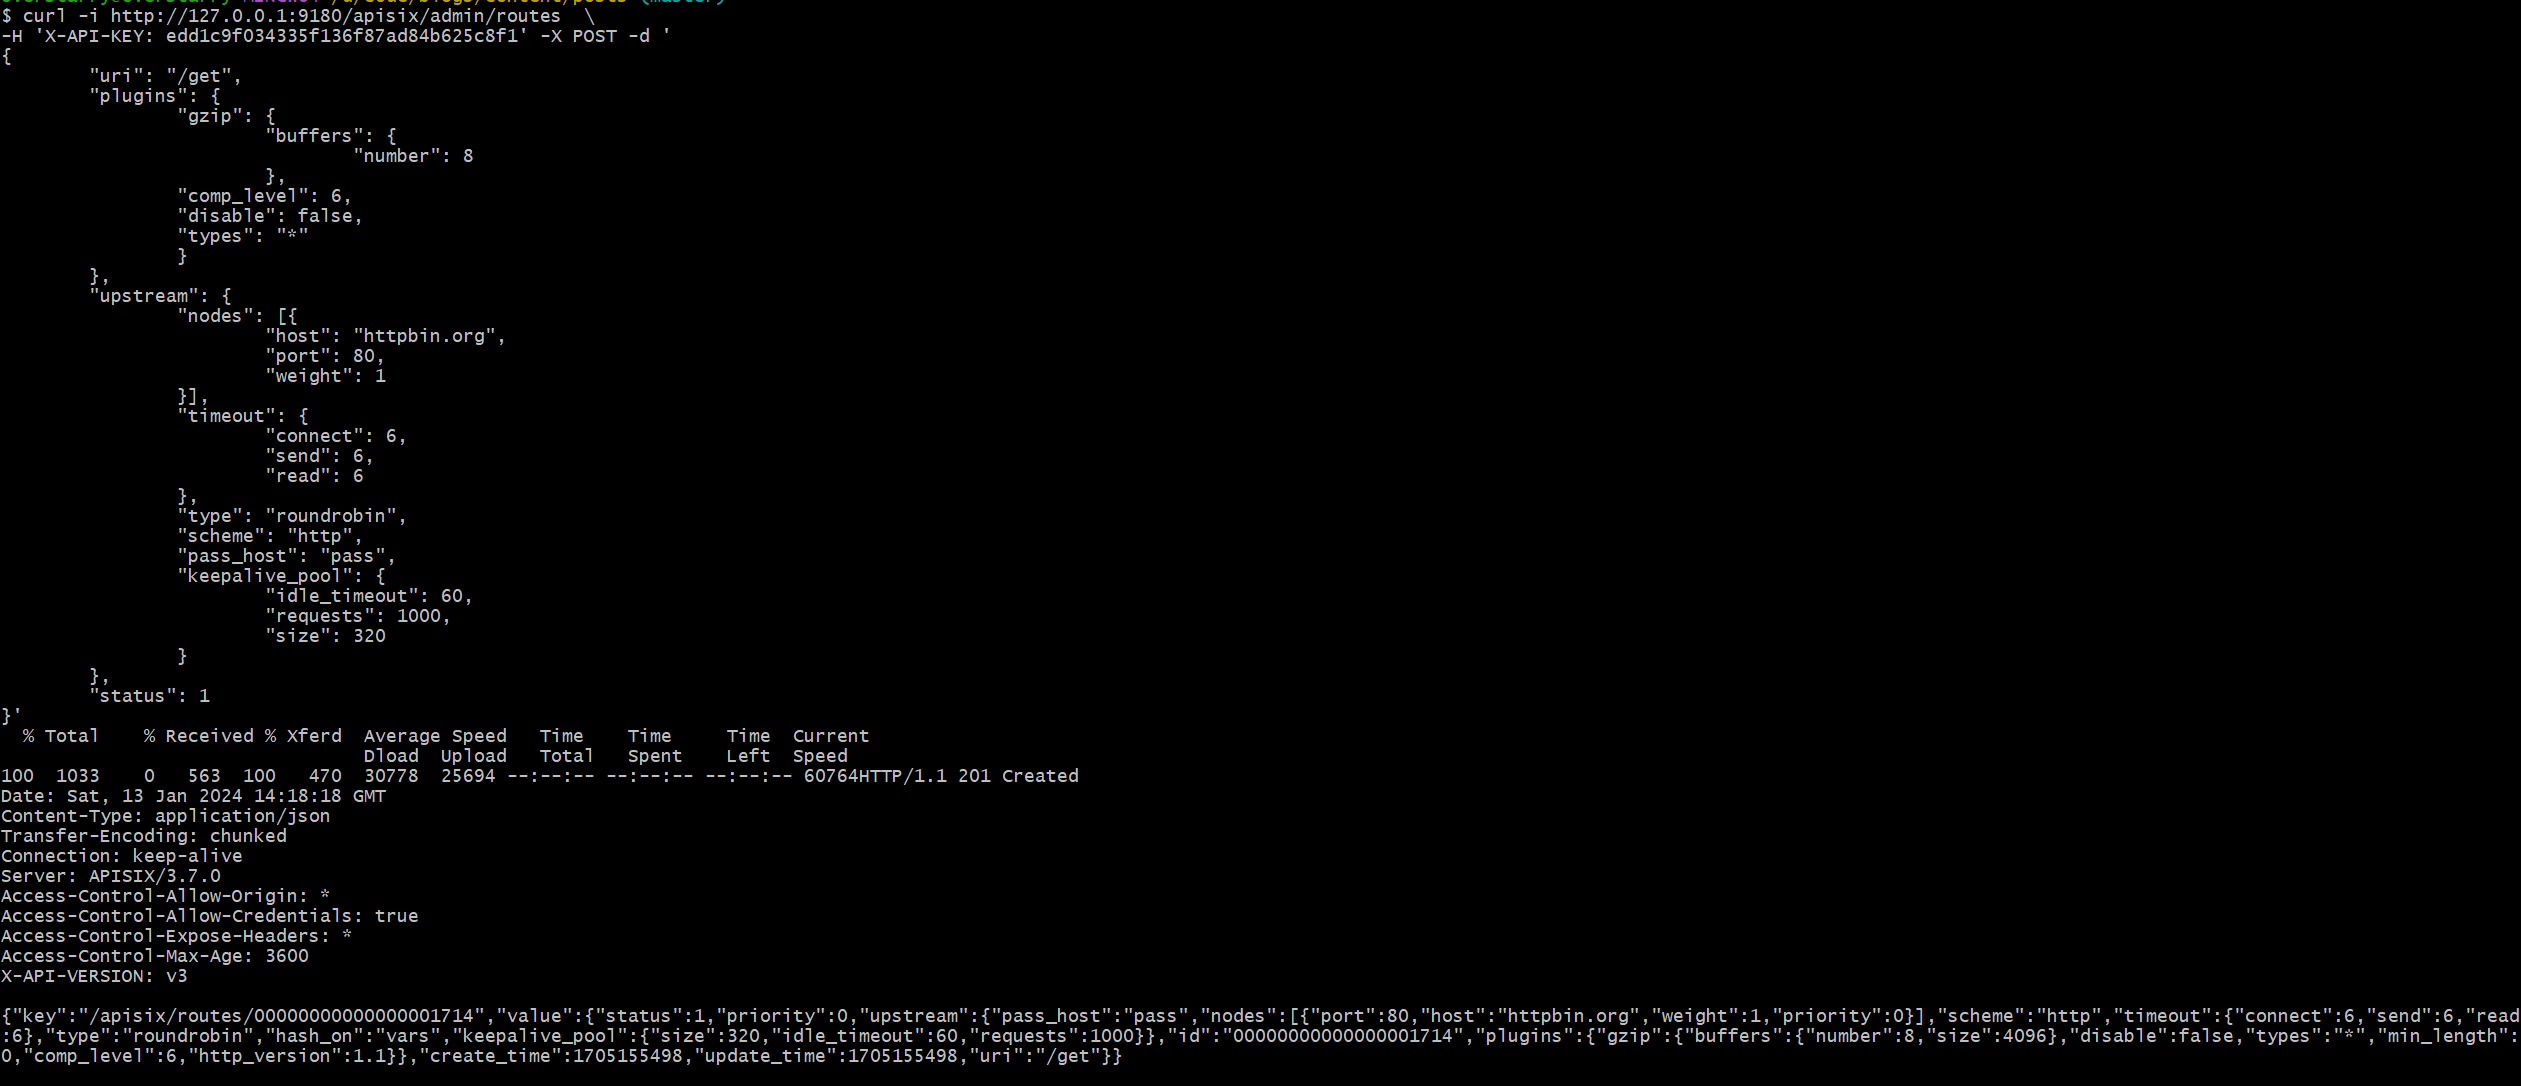
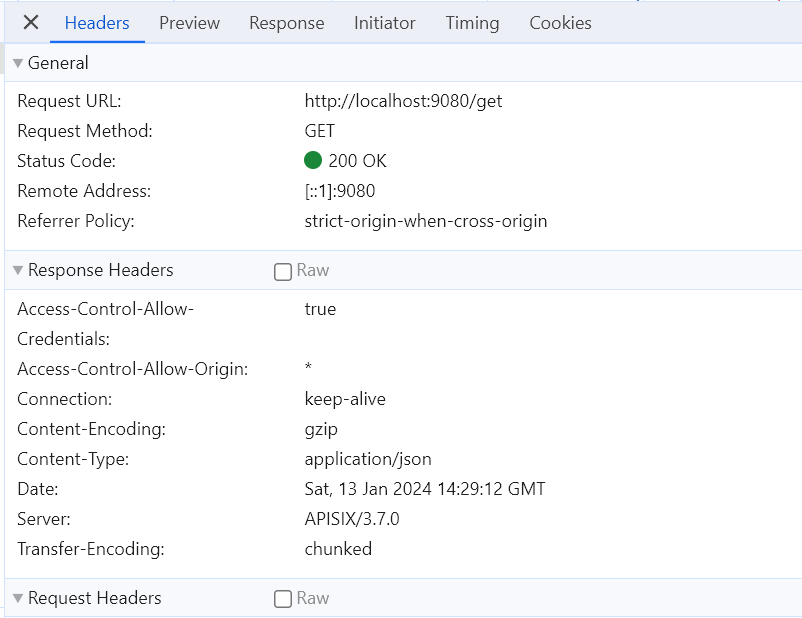
通过访问链接可以看到插件开启成功了。
接下来介绍另一种方法,自定义Nginx配置。
自定义 Nginx 配置#
接下来介绍另一种方法 自定义 Nginx 配置,这种方法可以针对全局路由开启 gzip。apisix 会通过 apisix/cli/ngx_tpl.lua 这个模板和 conf/config-default.yaml 加 conf/config.yaml 的配置生成 Nginx 配置文件。
在执行完启动后,你可以在 conf/nginx.conf 看到生成的 Nginx 配置文件。
打开 apisix 的配置文件 conf/config.yaml 文件,添加以下配置(需要注意原有是否有其它nginx配置):
 1
 2
 3
 4
 5
 6
 7
 8
 9
10
11
12
| nginx_config:
http_configuration_snippet: |
gzip on;
gzip_http_version 1.1;
gzip_buffers 256 64k;
gzip_comp_level 5;
gzip_min_length 1000;
gzip_proxied expired no-cache no-store private auth;
gzip_types application/javascript application/x-javascript text/javascript application/json text/css;
gzip_disable "MSIE 6";
gzip_vary on;
|
添加后,访问同样可以看见gzip开启。
本文介绍了两种为apisix开启 gzip 的方式,插件的方式简单快捷但一次只适用于单个路由,nginx 配置的方式麻烦但适合全局路由控制。